
Metal bed frame are available in dozens of various styles, enabling you to choose the one that best suits your needs. Despite the fact that each bed frame has somewhat distinct assembly instructions, the majority of them can be put together using relatively comparable procedures. Look for model-specific information in your instruction manual if getting stuck in process.
Method 1
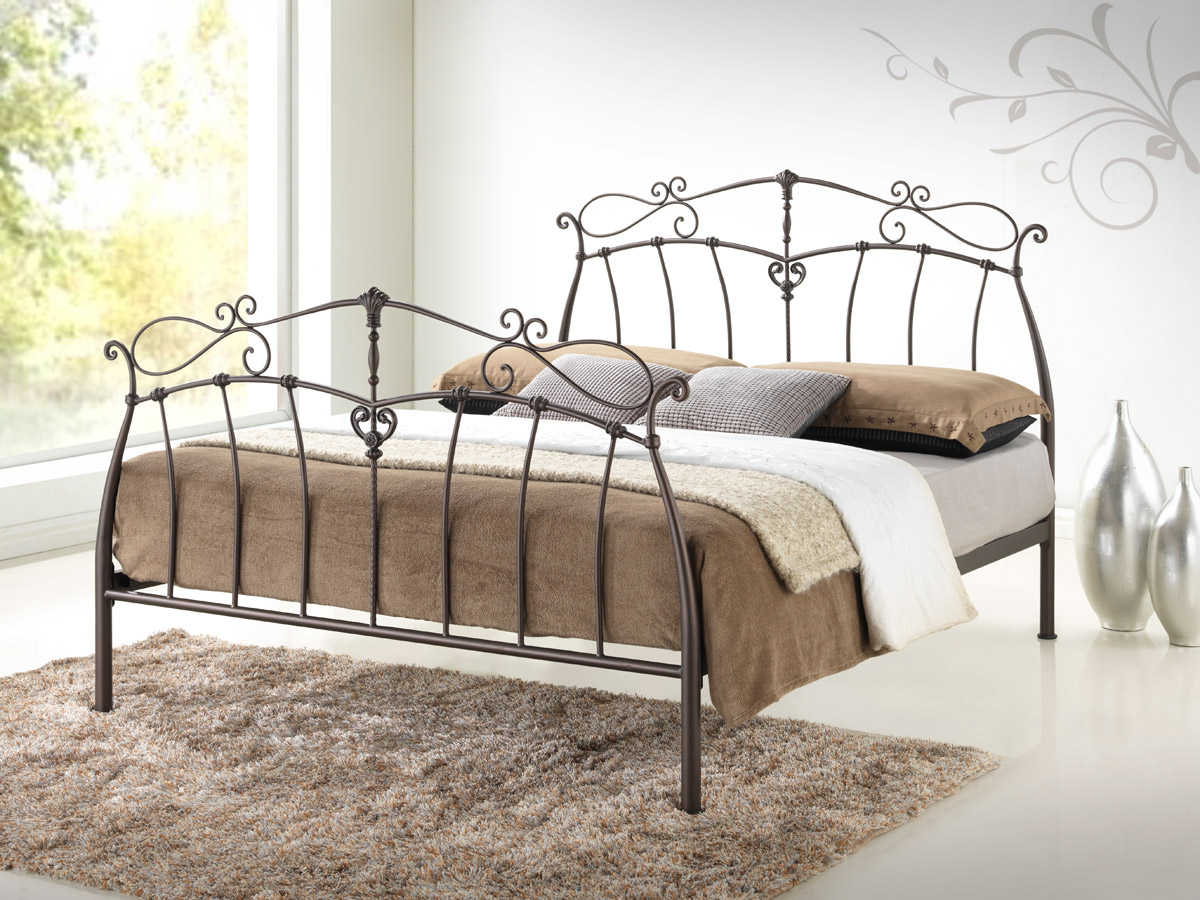
Putting Together a Metal Bed Frame
- Place the frame legs diagonally across each other. The left leg and the right leg are the two basic parts of most metal bed frame. Place these legs across from one another, allowing enough room in the middle for the mattress.
- Attach each of the frame legs’ feet or wheels. Each of the metal legs should have a small beam extending from it. Connect the provided plastic or rubber feet to the leg if you’re putting together an immobile bed frame. Connect the provided roller wheels if you’re putting together a mobile bed frame. Most bed frames should be able to connect these without the need of any extra hardware, while certain models may require the use of a screw and nut.
- Pull the frame legs’ side arms out. Most metal bed frames store their side arms within the metal legs themselves for convenience of packaging and installation. As a result, all you have to do now is take the arms out of the legs and completely stretch them. If the legs don’t come with sidearms already connected, you’ll have to attach them individually using screws and nuts.
- Bring the side arms together and secure them. Look for little holes and projecting nubs on the side arms, and if you find them, just push the nubs through the holes to join the side arms. If your side arms only have holes, you may need to use screws and nuts or the provided metal plates to join them.
- If required, add a central support beam. A central support leg is included with certain metal bed frames, particularly those that use a metal plate to join the side arms. Connect any required wheels or feet to the leg before laying it over the bed frame’s centre. If the middle of your side arms or legs has grooves, slip the ends of your centre leg into them. Otherwise, use screws and nuts to secure them.
- If required, add protective caps to the bed frame’s edge. If your bed frame has tiny, exposed metal bits on the corners, use the provided protective covers to cover them. Cover exposed metal on your bed frame with many pieces of duct tape if it didn’t come with caps. If you cover these areas, you won’t scrape your flesh if you bump against the bed frame.
- If desired, attach a headboard or baseboard. Headboards and baseboards are available on certain metal bed frames. If yours does, ensure the board is completely extended and, if required, use screws and nuts to connect any provided legs to it. You may simply insert the board’s legs into slots on the main bed frame on certain metal frames. Others will need you to align the legs with holes in the bed frame and secure them with screws and nuts.
Method 2
How to Assemble a Wooden Bed Frame
1.Align the headboard with the wall. Place the headboard (the higher wooden frame) against a back wall or other sturdy surface to make construction simpler. Because relocating a constructed bed frame is difficult, position it against the wall where it will sit when done. Because the completed side of the frame will be the one that everyone sees, make sure it points out.
- Some headboards are self-standing or leaning. If yours can’t, get the help of another person to keep it in place.
2.Attach the headboard’s side rails. Locate the little slots or grooves at the headboard’s base. On the left and right sides, there should be an equal quantity. One of your bed frame’s side rails should be attaching to either side of the headboard, with the completed side of each rail facing out. Some side rails may easily fall into position, while others may need the use of accompanying screws and nuts to attach them.
- Look for a little gap towards the end of each side rail if you need to fasten it with screws. Place a screw from beneath the headboard in each aperture and tighten it with nuts.
- If your side rails need to be attached to screws, drive a screw into the correct place on either side of your headboard and connect your side rail to it.
- Attach a bracket to either end of the headboard, then screw the brackets to their corresponding side rails if you need to secure your side rails with metal brackets.
3.Join the side rails to the baseboard. The baseboard may be attaching to most wooden bed frames using the same way as the headboard. Because your baseboard is shorter than your headboard, the grooves or holes in the baseboard may seem somewhat different, and any screws or nuts required to attach the baseboard may be smaller. Make sure your frame’s unfinished side faces in.
4. If required, attach board or beam guides to the side rails. Small panels, perforations, or ridges in certain side rails are meant to retain centre supports. If your bed frame lacks them, you may need to use screws and nuts to install the provided guidelines. Look for appropriate drilling sites along the side rails, then drill a hole in the board and connect your support guides.
- If you don’t have any marks on your side rails, count how many support guidelines you have and connect them to the bed frame at equal distances.
5. If required, add support legs to the centre boards or beams. If your centre boards or beams come with support legs, be sure you connect them to the rest of the frame before joining the centre supports. For certain bed frames, merely screwing the leg into the board or beam by hand is sufficient. Others may need drilling a hole in the support and securing the leg with a nut.
6. Attach the side rails to the centre boards or beams. If your bed frame has wooden or metal support beams, space them evenly throughout the frame. Alternatively, if you have wooden support panels, place them on top of the frame. If required, use screws and nuts to attach your supports, or slide them into locking grooves or holes.
- If your bed frame has both centre support beams and panels, fasten the beams first, then add the panels.
7. With a level and a tape measure, inspect the frame. Place a level on your side rails and centre supports before laying a mattress on top to ensure the bed frame isn’t tilted. If you bought an adjustable frame, check sure it’s the right size for your mattress by measuring it with a tape measure.
Explore more articles: BetaPosting


